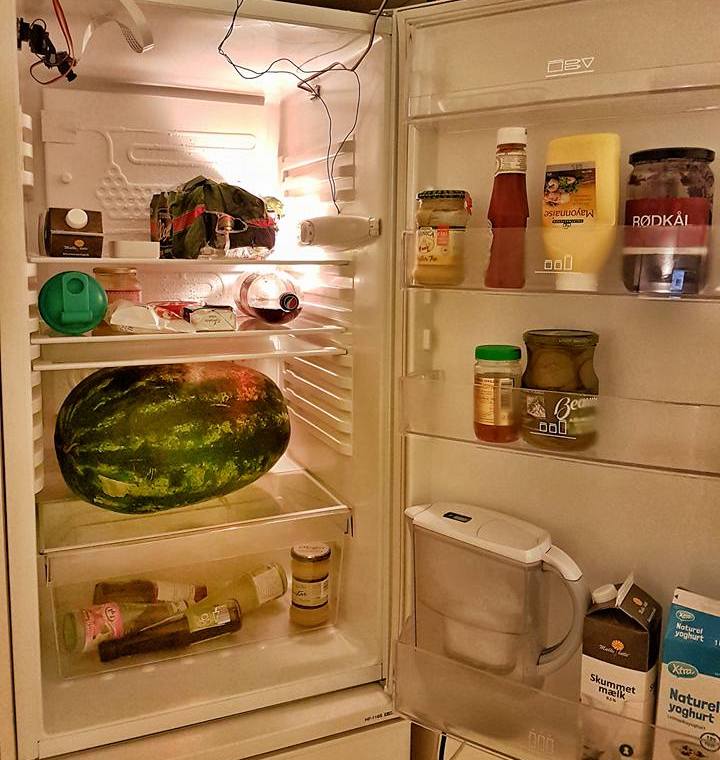
Fridge Heatmap (or Coolmap)
The cool temperature inside the fridge helps to keep the food fresh and slow down the creation of bacteria. However, it has been reported (food.gov.uk, eufic.org, cnet.com) that the temperature is not constant inside the fridge and that there is a proper way of organizing the food based on that. Is that true? And if so, how would a heatmap (or coolmap) of a fridge look like? Let’s find out!
Method
Our objective is to compare the temperature between the shelves of our fridge.
We know that the temperature goes up and down based on the built-in fridge thermostat and internal airflow, so we want to track the temperature simultaneously from several positions in the fridge. This means that we need several sensors. Also, we want to log the information over a longer period of time for further analysis.
For this, we decided to use the following:
| Item | Est. Price | Description |
|---|---|---|
| 1 x Adafruit Feather HUZZAH with ESP8266 WiFi | 15.95$ | Pretty small development board with built-in WiFi and smarts from Adafruit. Can also buy with Amazon Prime |
| 3 x DS18B20 | 3 x 1$-4.25$ | Digital temperature sensors. Can be bought for example from Amazon |
| 1 x Power supply with micro USB | ~5$ | The Huzzah can be powered using a micro USB cable. Alternatively, can use a Lithium Ion Polymer Battery. |
Just a side note. While we are not depending on any income from this blog, we do accept donations, and if you are following along and building this project, we would appreciate if you would use our affiliate links when buying components. Thanks!
The DS18B20 temperature sensors are digital and we can use several sensors on same wire. According to the datasheet, these can measure temperatures from -55°C to +125°C, so this is suitable for the temperatures we expect in the fridge. Accuracy is of ±0.5°C at temperature from -10°C to +85°C, which is not great but hopefully sufficient.
Step 1: Assembly
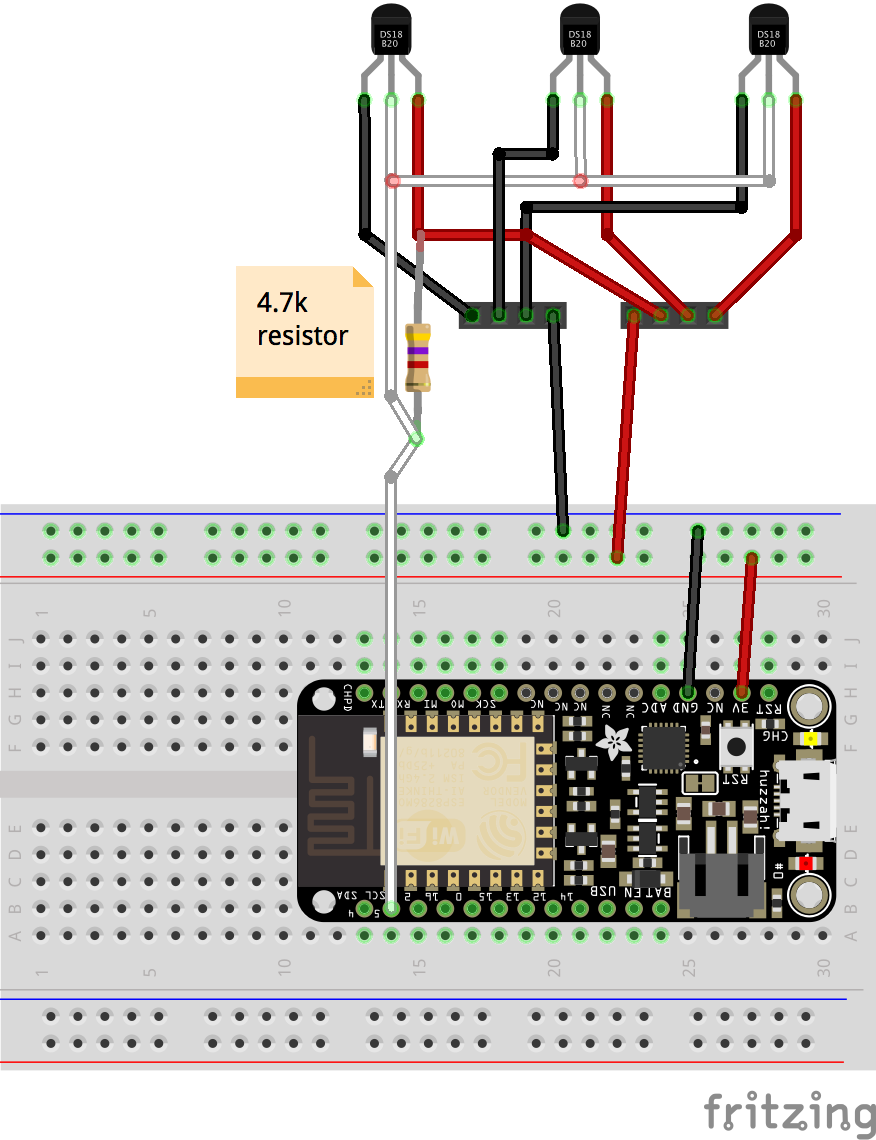
Here’s the setup, with 3 temperature sensors connected to the Feather Huzzah:
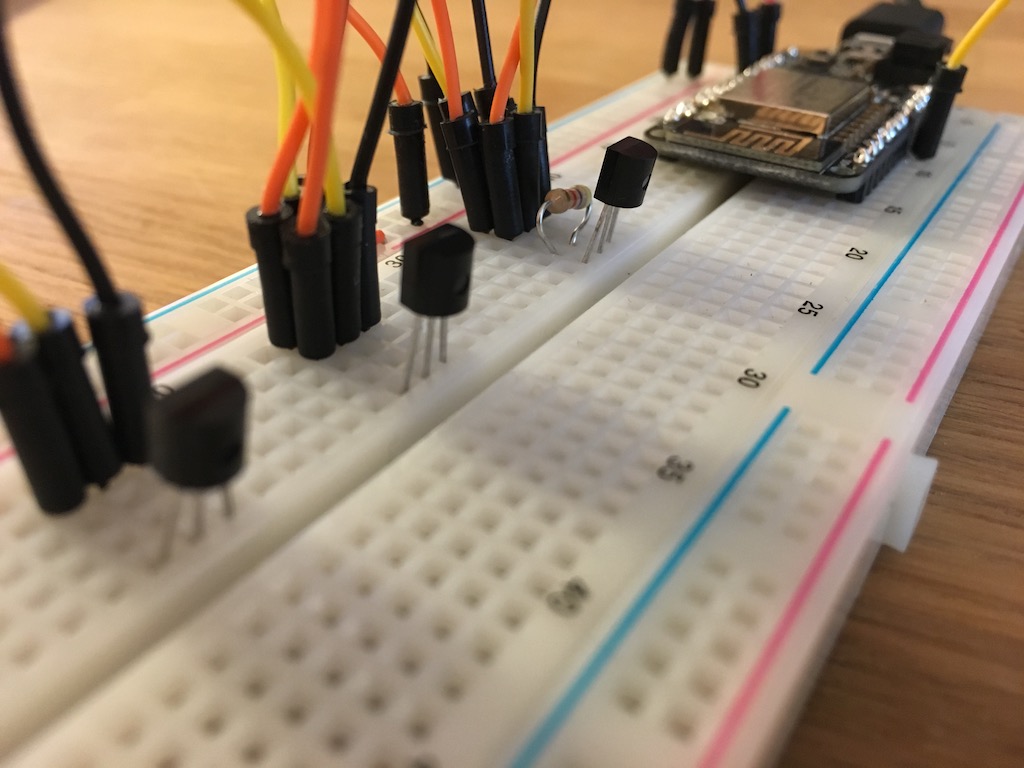
We first tested that the setup works on a breadboard.
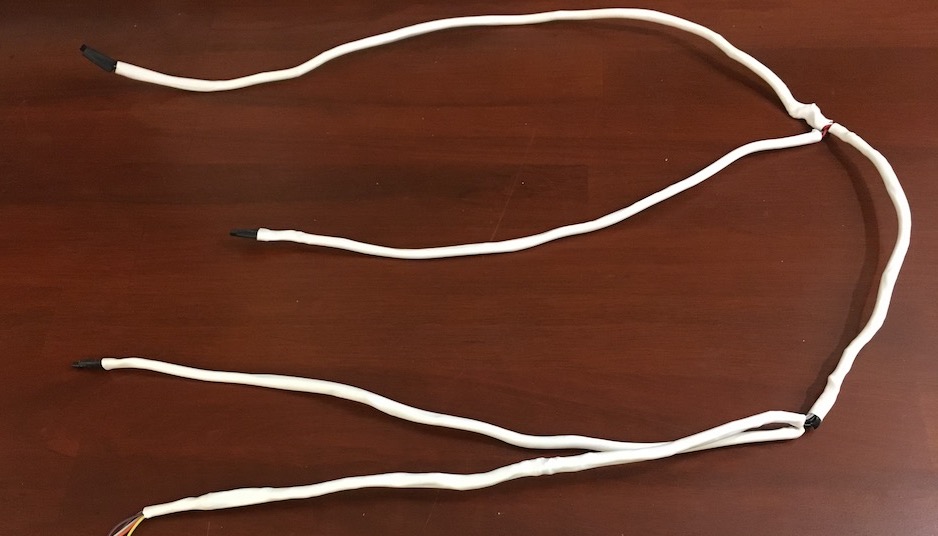
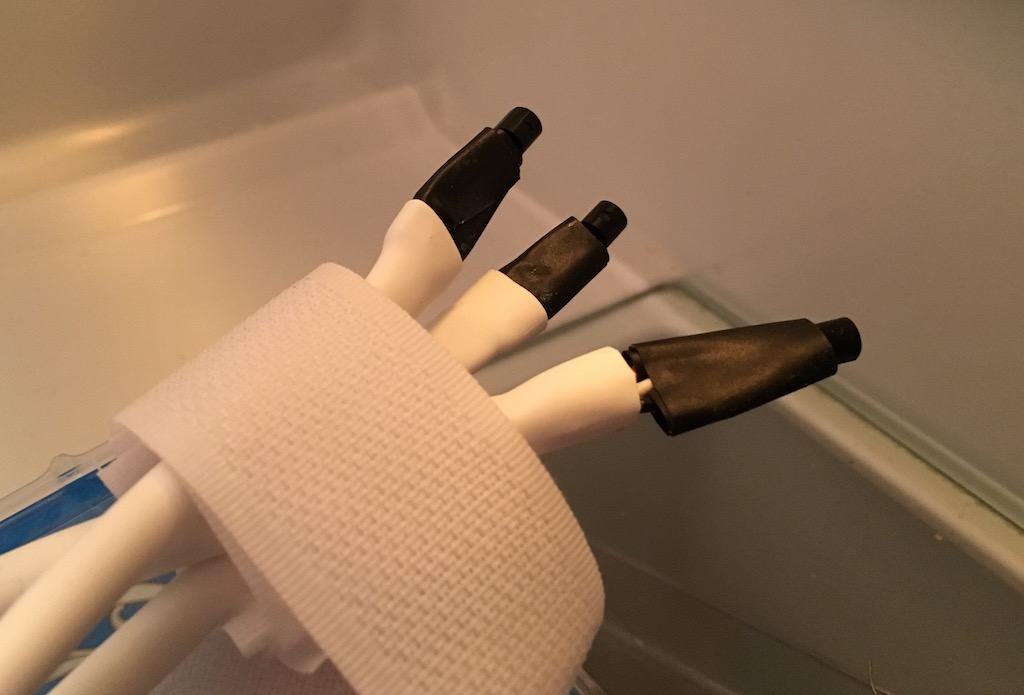
And then measured the distances between the top and bottom shelves and prepared the corresponding wires. We used white heat shrink tubes to keep the cables together.
Step 2: Calibration
As a baseline for our measurements, we first put all the sensors in the same place in the fridge, waited for the values to ‘stabilize’ for one hour and then checked the values.
In this chart, TMP1 is green, TMP2 is red, TMP3 is blue.
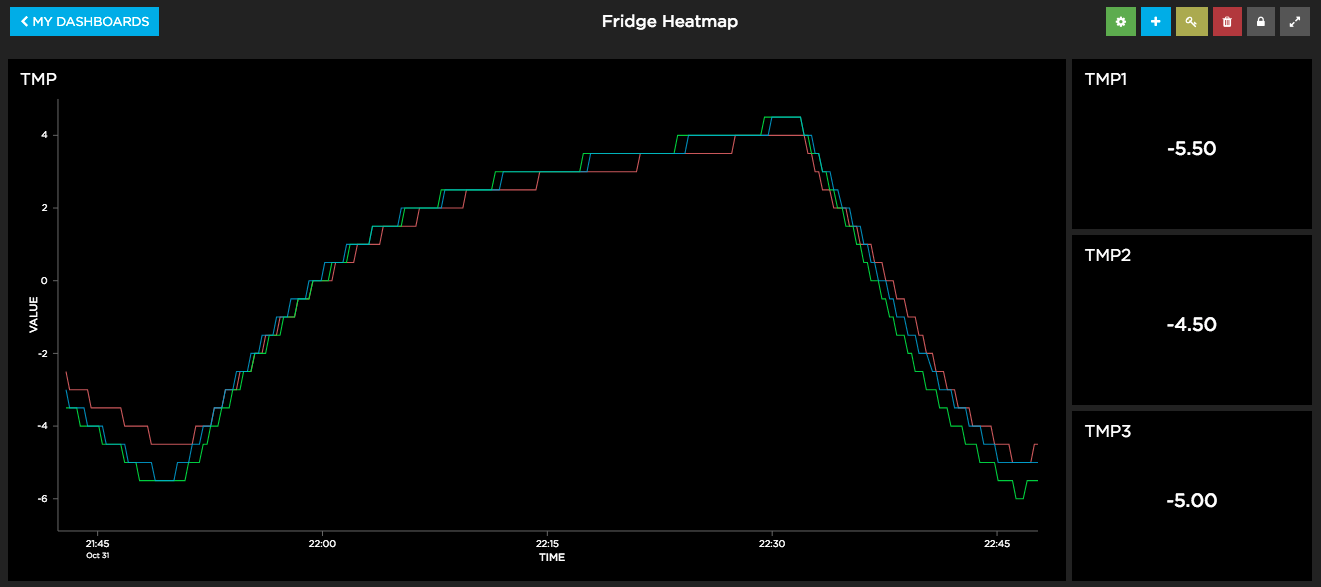
Note that even if we positioned all sensors next to each other and waited for the temperature to stabilize, we still can see some differences in the values recorded by each of the sensors. However, this is expected given the ±0.5°C accuracy mentioned in the datasheet.
Step 3: Collecting shelf temperatures
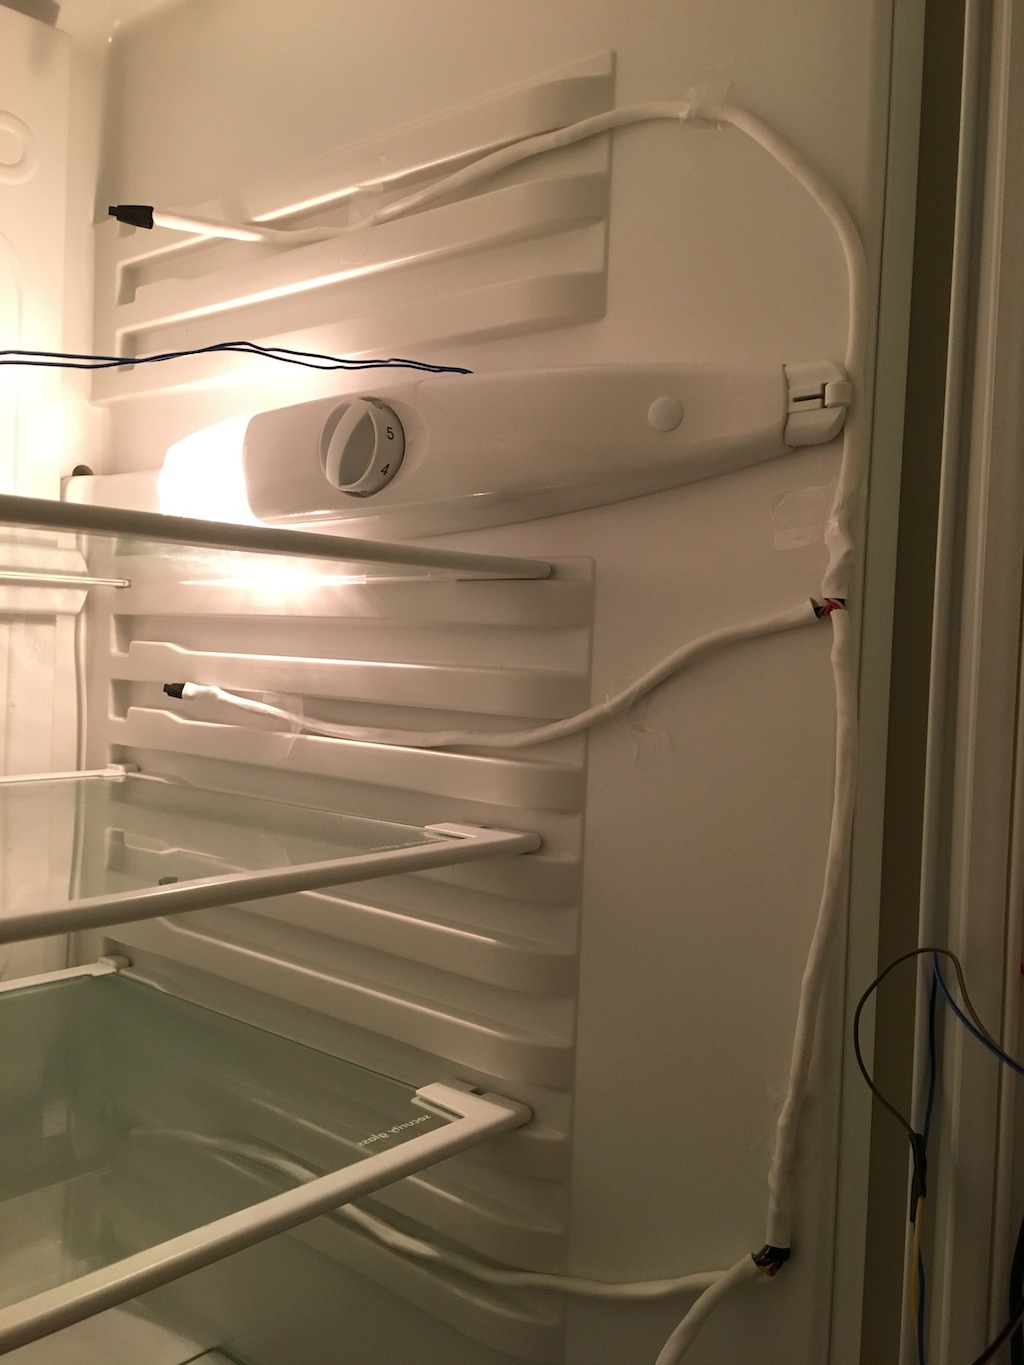
We then placed the 3 sensors on the fridge side at different positions: top shelf, middle, and bottom shelf.
Results
We have collected data from the 3 sensors over 4 days and mapped it to the different fridge shelves. The fridge stayed mostly empty but we opened the door a few times to get the jug of cold water.
Here’s the result in °C averaged hourly, as a Tableau Dashboard:
Conclusion: Proper Food Storage in the Refrigerator
We have measured temperature at 3 different shelves in our fridge and concluded that there are temperature differences between shelves, from the coldest at the bottom shelf to the warmest on the top shelf. This finding corresponds to other reports.
While the hourly averages over the 4 days are somewhere between 2 and 6 °C, it should be noted though that at the bottom shelf the minimum temperature we recorded over these days was of -3°C (at the bottom shelf) and the maximum temperature recorded was of 9°C (at the top shelf).
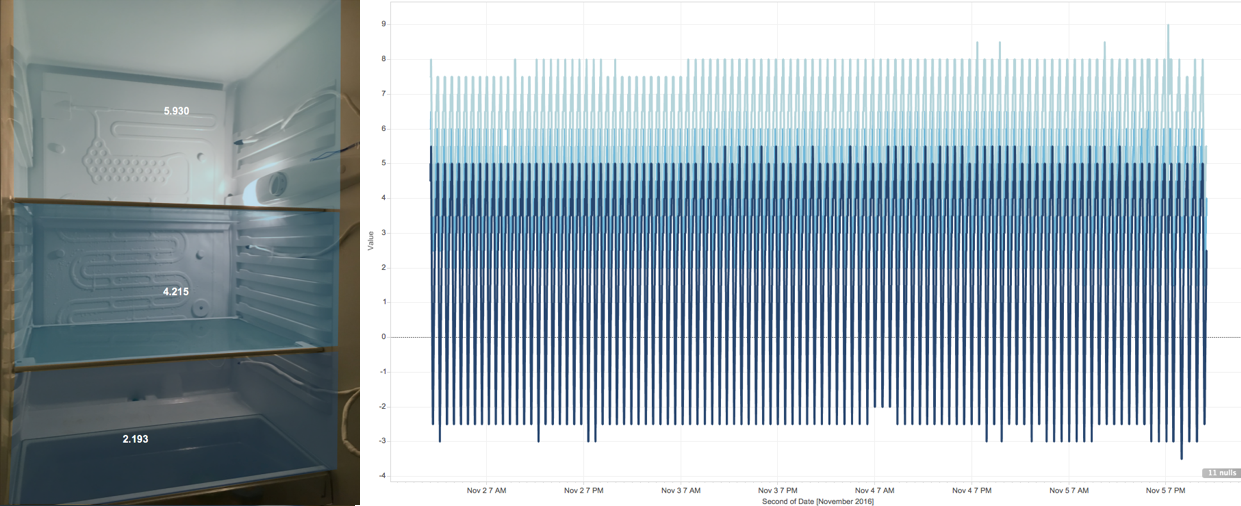
Based on this data, we can now make more informed decisions about the storage of the food in our fridge. It was surprising to see actually that the temperature went under 0°C, however it does explain why sometimes if we put the watermelon at the back of the fridge on the bottom shelf (because it’s easier to fit it in there) we take it out half frozen!
